Here’s how to use the Pixelate feature to turn generated images into pixel‑style graphics.
![]() How to Use Pixelate
How to Use Pixelate
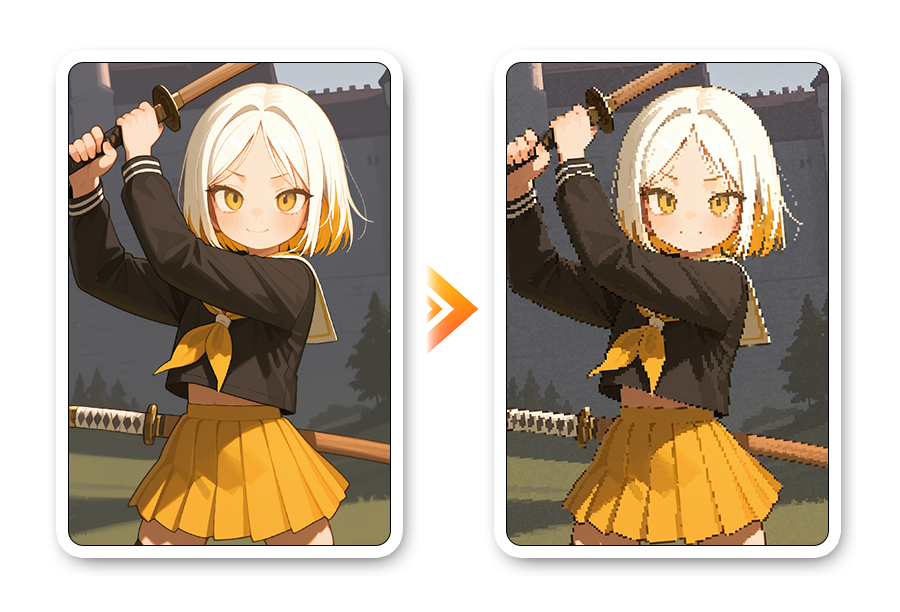
Pixelate is a feature that converts generated images into pixel art style aka dot images.
Reduce intricate details and reconstruct them into large pixel blocks—optimizing your images for game assets or pixel-style content creation, so you can easily produce pixel art.
1. Go to [Pixelate]
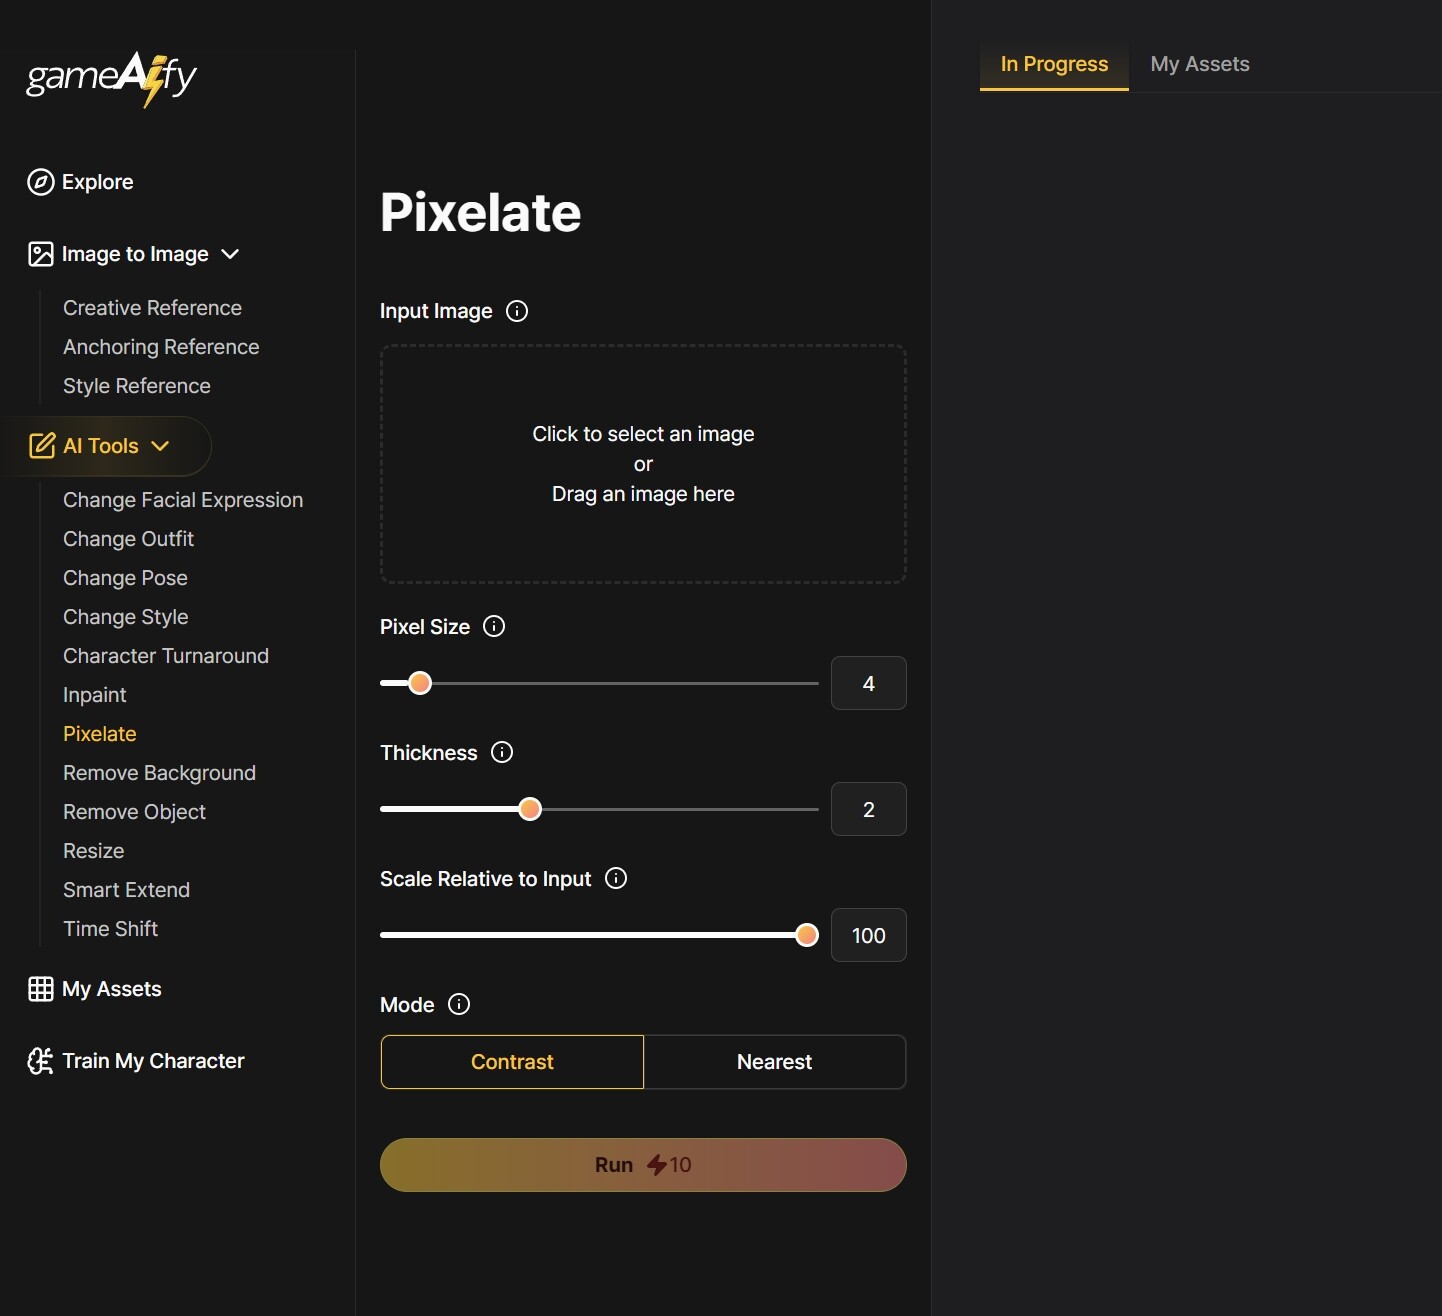
2. Upload an image at Input Image.
- Click to use an image imported from outside
- You can also upload images stored in [My Assets] by dragging and dropping.
3. Proceed with detailed settings
i. Pixel Size: The higher the value, the bigger the pixels, and the rougher and simpler the image will be expressed.
- Low value → Fine dots
- High value → Big dots, retro-style
ii. Thickness: Sets the thickness of the outline of each pixel block. Use this when you want to emphasize the dot boundaries more clearly; setting the value to “0” will create an output without a border.
- Ex) “When you want to emphasize the outline of characters or objects”: Move to a large value to emphasize the outline thickness.
- Ex) “When you want to generate a background image”: Usually move to a small value to minimize the outline thickness or set to “0” for no border.
iii. Output Scale: This option lets you determine how much to enlarge the pixelated image when outputting it.
- You can set it from 0.1x to 1.0x (10% to 100%) compared to the basic resolution. If the image feels too small, try increasing the Output Scale value
iv. Mode: Sets how much to enlarge the pixelated image for output.
- Contrast: Emphasizes high-contrast colors within the block to create a sharper look.
- Nearest: Naturally adjusts each block to the color closest to its average value.
![]() Tips:
Tips:
✦ Contrast is useful when you want to emphasize the pixelated look.
✦ Nearest is recommended when preserving accurate color is important.
Try various combinations to create your own dot-style images.